Thursday, May 30, 2013

Tutorial Thursday: DIY Washi Paper Tape Bows

Washi tape. It's this paper tape.. kind of like masking tape or painter's tape. You can stick it on practically anything, it seems! I had no idea what it was, let alone what to do with it when I first heard about it. Why on earth would anybody go nuts over some tape, no matter how pretty it was? Horrible thoughts of sticky, gooey messes and hours spent with bottles of Goo Gone made the tapes unappealing. 

And then.. yes.. wait for it.. 

 Then I had a lightbulb moment when I had nothing nearby but had to mark where a roll of packing tape ended. Out rolled the washi tape I had owned for the longest time, but hadn't touched. RIIIPPP! went the tape and I stuck it onto the end of the packing tape. I was astounded at how easily the washi tape disentangled itself from the packing tape with no sticky residue (or any trace, for that matter). I was sold!

There appears to be a bazillion and one ways to use the thing.. from decorating thumbtacks to making over keyboards, broken ipads or room walls. The MT tape site is pure visual overload for me (seeing that I can't read Japanese, but that's no hinderance to appreciating the site!). You can even use the tape on your keyboard to teach someone how to play! It's all here in the MT Casa Gallery.

In the midst of all this clicking, I came across these DIY bows. It was one of the more original tutorials and my interest was piqued. 


Seemed simple enough, so I gave it a go. They turned out exactly the way they were supposed to but I didn't really like the bit in the middle. Seemed too fat and wide in relation to the rest of the bow so I made my own modifications.

Here's what you need:


Scissors, some washi tape and a something to decorate!


So I started by measuring the lengths I needed.
I roughly guessed it to be1.5x the width of my present.


Then I cut a 2nd strip that was about half that length.
This shorter piece is what you use to make your ribbon tails.


So I started folding my long piece of tape length-wise..
You can follow the tutorial and fold the tape onto itself across too.
All that matters is that at the end of it all, both sides of the strip of tape aren't sticky.
If you choose to fold the tape transversely, don't forget that you'll need double the tape length!


So anyway, I take my non-sticky strip of washi tape and loop it around to form a circle


I cut a thinner piece of washi tape (just cut one strip down the middle to get 2 thin strips)


This thinner short strip of washi tape is used to tape the ends of the loop together.
Instead of wrapping it all the way around, I left a bit of a tail.. You'll see why soon!


This is the fun part.. you sit the loop up like a wheel about to be rolled and then you squish it!
This is where I use the bit of extra tail and wrap it around the squished loop to form 2 loops of the bow.


This is where I made another modification to the tutorial.
I didn't like how uniformly squat the middle of the bow was, so I made 2 transverse snips in middle of the shorter piece from the beginning of the tutorial (make sure you don't accidentally cut all the way across and join up the 2 snips!). Then I folded the corners in to make a "waist" for the tape.


I found it easier to wrap the thin, middle piece of washi tape around both loop and ribbon tail piece when the tail piece had a "waist" to wrap around.

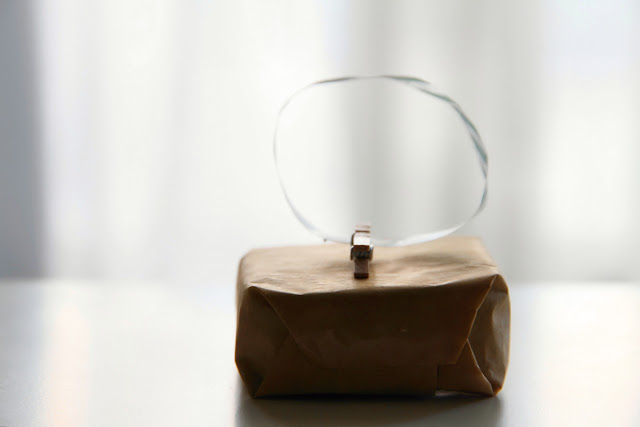
Now, all that's left is to fluff up the loops of your bow and trim the tips of the tails and you've got a bow! The middle bit between the 2 loops are a tad naked, so it's a free-for-all when it comes to deciding what fills up that space. I made a mini-loop and stuck it on with double sided tape (seen in 1st picture of this post). You could attach a flower bud, rhinestones, bells or other embellishments as you please :)


Tips and hints

  • I prefer a narrower middle section between the two bow loops so I trimmed the little strip to a smaller width before wrapping it around. This one's just a personal preference.
  • To cut a perfectly symmetrical "V" at the ends of the ribbon tails, pinch the ends together (sticky side facing out) and snip off the corner starting about 1cm before the end of the tape at the folded side and heading towards the end of the tape to the open side
  • Take your time and have fun experimenting with the different lengths of the tape! The 3 lengths are only a reference because really, doesn't it depend on how big a bow you want to make in the end? No point having a teeny 2cm bow on  a big happy gift hamper..!


Tuesday, May 28, 2013

Tuesday Treasures: Patterns In Red

Polka dots and dotty dots,
Starflakes and stars,
Squigly lines and curly ones,
Checkered prints and bars

Patterns, patterns everywhere
As you can plainly see
Matching them with solid blocks
Is definitely key!

So have a play with patterns,
Start with these below..
Hope that you'll be inspired
And get a happy glow!

* * *

'Patterns in Red' curated by kerrianneanderson
PRINTABLE Valentines Circle Tag - A Summer's Love Series - ZestAndLime
1960s shift dress - red floral print - tailored shape - vintage style - every day retro fashion - home made fashion - StarTribeVintage
Red check print clutch purse - mincdesign
Clothed Cutlery in Red Starflakes - Disposable Washi-Patterned Wooden Forks, Spoons or Knives (A Dozen) - Gloriousmess
Handmade Bow TIe - Rusty Orange Daisy Chain - BTIES
Red with White Stars Pattern Glass Covered Post Earrings - TrinkArts
Red Gem Cushion Cover- A retro style pattern in a bold red - CharleeLeMore
Tribal pattern coin purse in red on natural linen colour Geometric - SeventhSphere
Washi Masking Tape - Red Circles - rabbitandtheduck
25 Red and White Chevron Pattern Paper Straws - Standard 7.75" or 19.68cm - CraftyCreations2012
Mr and Mrs red bunny little dish set - Belinism
Tea Towel - Hand screen printed - linen - eco friendly ink - red on natural - LIZ design - TongueinChicHome
Algarve cushion cover in white ink on watermelon pink linen with green piping 47cmx47cm - AquaDoorDesigns
pencil case with red sausage dog embroidery. cross stitch patterned taupe fabric - edwardandlilly
iPad (2 & 3) Decal - Red Honeycomb Pattern - AlteredDezigns
Tones of Red-Pillow 40x40cm.Throw pillow, boutique designer fabric, linen cotton blend. Stylish watercolour pattern. - sitstaygo

Friday, May 24, 2013

Fails, Wrecks and Giggles! Oh my!

I can't believe it's Friday, again! The days are long but the weeks fly by. Hope everyone's week went well. Mine was great! Met up with my Girls and Moo Moo, the cat (no, he doesn't moo like a cow) and had a great catch up session. The hubby even came along, which was quite sweet :)

In my internet travels, I've come across some interesting blogs. Stumbling across this Pinterest Fail blog made me re-visit other "Fail" blogs that have made me shed tears and nearly had me die of laughter. These are all done to elicit laughs and aren't meant to be mean. Though I laugh as loud as the next person reading the posts, I also try and use these sites as a "what not to do" reminder for myself. If you've seen any wrecks, maybe you'd like to submit your story to them. All three blogs take reader submissions.

Laughing in the morning is an awesome thing and makes the day seem more shiny and bright. Thought that this would be a good way to end the week for you guys, especially for those who could have had a better one.

Enjoy! :)

Oh! Before I forget.. we're on Instagram now!! :) Yes, a bit late to join but already quite addicted. You know it's a bad sign when you have to talk yourself down from wanting to post a photo up every hour. Anyway, hope to see you there! Find us @sharethemess or click follow on the right-hand side of this blog.

Ok, get ready to giggle and cringe!


Pinterest Fail: Where good intentions come to die - Started by Jenna to giggle, learn and improve together.


Cake Wrecks: Where professional cakes go horrible, hilariously wrong - Started by Jen out of boredom. This was the first "fail" blog I've ever encountered and many quality hours have been spent gawking and gaping at some of the wrecks between myself and the hubby.


You Are NOT A Photographer - A blog by Ginger and Mary Anne that chronicles some pretty horrible results of people calling themselves professional photographers (they're dubbed Fauxtographers, how clever!). Sometimes, I feel quite bad for the photographer who really believed they were taking a magnificent photo. Then, there are the ones that try hard to "make it" onto the blog.. and those, I don't feel bad for at all!


Pin It button on image hover